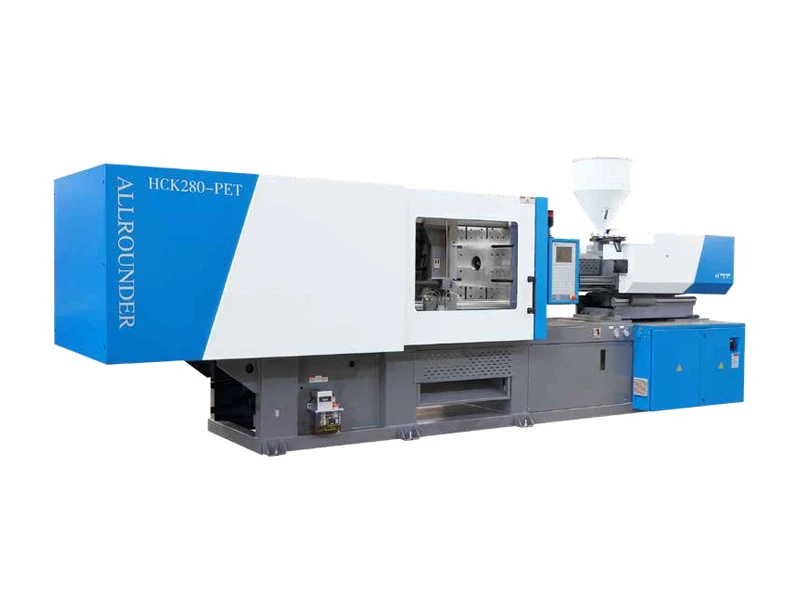
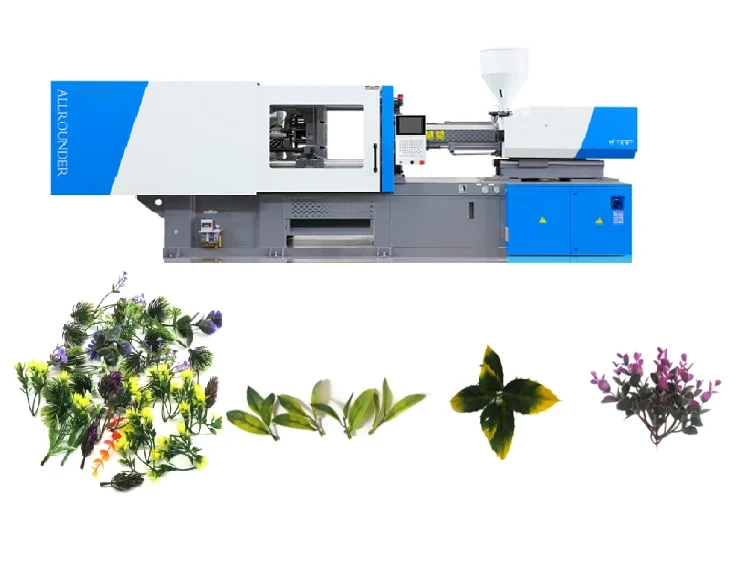
Setting up an artificial plant injection molding machine production line isn’t the same as setting up a standard plastic parts line. Artificial plants have thin walls, complex shapes, and often require two or three colors in a single part.

A plastic flower or tree part can be as thin as 0.3mm. A single leaf may need two colors that blend naturally. A flower stem might need different flexibility from the petals. This means your artificial plant production line injection molding configuration must address three things: part geometry, color requirements, and material behavior.
Most artificial plant manufacturers start with a general-purpose machine and struggle with defects. Short shots, sink marks, and poor color transitions are common problems. The solution isn’t a bigger artificial plant injection molding machine — it’s the right injection molding machine with the right auxiliary equipment. This guide walks you through each step of setting up a production line that works.
Understanding the Artificial Plant Production Workflow – Six Steps from Mold to Finished Produc
- Key Equipment for an Artificial Plant Production Line – What You Actually Need
- Production Line Layout and Space Planning – Making the Most of Your Floor Space
- Scaling Up – From Pilot Line to Full Production
- Common Mistakes When Setting Up an Artificial Plant Production Line
Understanding the Artificial Plant Production Workflow – Six Steps from Mold to Finished Product
Artificial plant production follows a specific sequence. Each step affects the next. If you skip planning on the front end, you will fix problems on the production floor.
- Step 1 – Mold Design and Customization
- Step 2 – Machine Selection and Configuration
- Step 3 – Material Preparation and Drying
- Step 4 – Injection Molding Production
- Step 5 – Post-Processing and Assembly
- Step 6 – Packaging and Shipping
Step 1 – Mold Design and Customization
The mold determines everything. A poorly designed mold causes short shots, flash, and long cycle times. For artificial plants, molds must handle thin-wall sections (petals and leaves) and thicker sections (stems and bases) in the same part.
You need to decide on cavity count early. A 4-cavity mold gives you four parts per cycle. An 8-cavity mold gives you eight. More cavities lower your per-part cost but require higher clamping force and more precise temperature control. For artificial flowers, petals and leaves typically use multi-cavity molds to achieve the high output required for cost-effective production.
The mold must also support the color configuration you plan to run. Single-color molds are simpler. Two-color molds require additional channels and precise timing to prevent color bleeding.

Step 2 – Machine Selection and Configuration
This is where most manufacturers make expensive mistakes. You cannot run a two-color artificial flower on a single-color machine. And you cannot run thin-wall parts on a machine with slow injection response.
Single-color machines work for basic products where the entire part uses one color. These are the most affordable option and easiest to operate.
Two-color machines have two injection barrels. Each barrel can heat and inject different colors or materials. The machine controls the proportion of each material through valve timing. This allows natural color transitions on leaves and petals. Two-color injection molding technology allows two different colors of plastic to be injected into different chambers in the mold in a single injection process.
Three-color machines add a third barrel for more complex color patterns. These machines cost more but give you the highest level of realism.
For artificial flowers and plants, the CMS two-color artificial plant injection molding machine series can easily realize high-end visual effects including two-color gradient and layered coloring. Some manufacturers use three-color configurations for premium product lines.
Step 3 – Material Preparation and Drying
Plastic materials for artificial plants come as pellets. Not all pellets are ready to use straight from the bag.
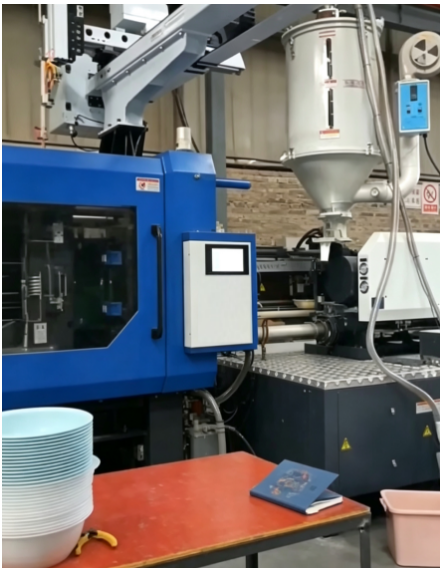
Material drying is essential for many plastics. Moisture causes bubbles and surface defects. Each material type has its own drying requirements. For example, some engineering plastics require drying at specific temperatures for several hours before processing. For artificial flowers, the selected plastic material is fed into a heated barrel where it is melted under high temperature and pressure.
Material blending matters for two-color and three-color production. You need consistent pellet quality to get consistent color transitions. Variations in the raw material will show up as variations in the finished product.

Step 4 – Injection Molding Production
The actual molding process follows a standard cycle: melting, injection, cooling, and ejection. But artificial plants have specific requirements at each stage.
Melting must be thorough but not excessive. Overheating degrades the plastic and causes discoloration. The molten plastic raw materials are then injected into the customized plastic flower or tree mold through the injection molding machine.
Injection must be fast enough to fill thin-wall sections before they cool. For artificial flowers, the injection speed is fast, with a single injection cycle taking only 20 seconds.
Cooling must be uniform to prevent warpage. Uneven cooling causes petals to curl and leaves to deform.
Ejection must be gentle enough not to damage thin sections. Robots are often used for consistent, damage-free removal.
The entire process — from melting to ejection — repeats every cycle. The cycle time directly affects your production capacity.

Step 5 – Post-Processing and Assembly
Parts come out of the mold as individual components: petals, leaves, stems, and bases. These need assembly into finished products.
Trimming removes any flash or gate marks. For thin-wall parts, this must be done carefully to avoid damage.
Assembly connects the components. Some flowers need petals attached to stems. Some trees need branches attached to trunks. This can be done manually or with automation.
Quality inspection checks for defects. Common issues include short shots, sink marks, and color inconsistencies. Catching these early prevents defective products from reaching customers.
Step 6 – Packaging and Shipping
Finished artificial plants need packaging that protects them during shipping. This is often the final step before products leave your factory.
Key Equipment for an Artificial Plant Production Line – What You Actually Need
A complete artificial plant production line includes more than just the injection molding machine. Here is what you actually need.
- Injection Molding Machine – The Core Equipment
- Mold Temperature Controller – The Quality Regulator
- Material Dryer and Loader – The Material Handlers
- Take-Out Robot – The Automation Enabler
Injection Molding Machine – The Core Equipment
This is your primary production equipment. The machine melts plastic and injects it into the mold.
For artificial plants, you need a machine that handles thin-wall molding. Standard machines often struggle with short shots and sink marks on thin parts. The clamping force should match your mold size. For most artificial flower and tree production, clamping forces in the 140–230 ton range work well.
Key specifications to check:
-
Injection speed (higher is better for thin walls)
-
Shot volume accuracy (consistent shot weight means consistent parts)
-
Temperature control precision (prevents material degradation)
Haichen offers single-color, two-color, and three-color configurations for artificial plant production. The two-color machine uses two barrels, each independently heated and controlled. The injection speed is fast, with a single injection cycle taking only 20 seconds.

Mold Temperature Controller – The Quality Regulator
Mold temperature affects part quality more than most manufacturers realize. Too hot, and the part warps. Too cold, and you get short shots.
A mold temperature controller circulates water or oil through the mold to maintain consistent temperature. For artificial plants, different sections of the mold may need different temperatures — the thin petal sections cool faster than the thicker stem sections.
Temperature controllers come in different capacities. The right size depends on your mold size and cycle time. Undersized controllers cannot keep up with production demands. Oversized controllers waste energy.
Material Dryer and Loader – The Material Handlers
Most plastic pellets need drying before processing. Moisture causes bubbles, surface defects, and degraded material properties.
A material dryer removes moisture from the pellets. Different materials need different drying conditions. For example, some plastics require several hours of drying at specific temperatures.
A material loader moves dried pellets from the dryer to the machine hopper. This automates material handling and prevents contamination. Loaders can be configured for single materials or multiple materials (for two-color and three-color production).
Take-Out Robot – The Automation Enabler
Removing thin-wall parts by hand is inefficient and risky. Parts can be damaged during removal. Cycle times are longer because the operator must wait for the mold to open and then carefully extract the parts.
A take-out robot automatically removes parts from the mold. This improves consistency, reduces damage, and shortens cycle times. For multi-cavity molds, robots can remove all parts simultaneously.
Robots also handle part placement — they can place parts onto conveyors or into cooling stations for post-processing.
Production Line Layout and Space Planning – Making the Most of Your Floor Space
Equipment placement affects workflow, efficiency, and safety. A poorly planned layout creates bottlenecks and wastes time.
- Machine Placement and Material Flow
- Auxiliary Equipment Positioning
Machine Placement and Material Flow
Start with the injection molding machine. It is the center of your production line. Position it so that operators can access both sides — the control side for operation and the rear side for maintenance.
Material flow should move in one direction: raw material in, finished product out. Place the dryer and loader on one side of the machine. Place the take-out robot and conveyor on the other side.
Leave enough space around the machine for maintenance. You need access to the barrel, the clamp, and the control panel. A crowded machine is difficult to service and dangerous to operate.
Workstation placement matters for assembly and inspection. Position assembly stations close to the conveyor so parts don’t need to be carried far. Keep inspection stations well-lit and away from machine vibration.
Auxiliary Equipment Positioning
Auxiliary equipment includes the mold temperature controller, chiller, dryer, and loader. These support the main machine but don’t need to be right next to it.
Place the chiller and mold temperature controller close to the machine. Shorter water lines mean faster temperature response and less energy waste.
Place the dryer and loader within reach of the machine hopper. The loader needs to move pellets from the dryer to the hopper without long travel distances.
Place electrical panels in accessible locations. You need to be able to shut off power quickly in an emergency. You also need access for troubleshooting and maintenance.
Safety considerations: keep walkways clear. Mark machine operating zones. Install safety gates around the machine. Provide fire extinguishers near the machine and the material storage area.
Scaling Up – From Pilot Line to Full Production
Starting small is smart. It lets you work out process issues before committing to large capital expenditure. But at some point, you need to scale.
- When to Scale – Signs You Are Ready
- How to Scale – Adding Machines Without Adding Problems
- Cost Considerations for Scaling
When to Scale – Signs You Are Ready
You are ready to scale when three things are true:
First, your pilot line runs consistently. You can produce good parts cycle after cycle without constant adjustments. If you are still fighting the machine every day, scaling will multiply your problems.
Second, you have demand. You cannot sell what you cannot produce. If orders are exceeding your pilot line capacity, it is time to add machines.
Third, you understand your costs. You know your per-part cost and your breakeven point. Scaling without this knowledge is gambling.
How to Scale – Adding Machines Without Adding Problems
The simplest way to scale is to add identical machines. This keeps training simple and spare parts common. Operators who know one machine know all of them.
Add capacity in steps. One machine, then two, then four. Sudden large expansions create management problems and quality issues.
Maintain the same configuration. If your pilot line uses a two-color machine with a specific mold temperature controller, use the same setup for new machines. Changes in configuration create variation that is hard to manage.
Plan for auxiliary equipment. More machines mean more dryers, more loaders, more chillers. These are not optional — they are required for consistent quality.
Cost Considerations for Scaling
Scaling reduces per-part cost. Fixed costs (mold amortization, machine depreciation) spread across more parts. Variable costs (material, labor) may decrease with volume discounts and efficiency gains.
Machine cost is the largest single expense. A two-color injection molding machine costs more than a single-color machine but enables higher-value products.
Mold cost depends on cavity count and complexity. Multi-cavity molds cost more upfront but lower per-part cost over time.
Labor cost does not scale linearly. One operator can run two machines. Two operators can run four. Automation reduces the labor required per machine.
Common Mistakes When Setting Up an Artificial Plant Production Line
Most problems on artificial plant production lines come from preventable mistakes. Here are the most common ones and how to avoid them.
Mistake 1 – Choosing the Wrong Machine Configuration
A single-color machine cannot produce two-color products. A two-color machine cannot produce three-color products. Trying to force a machine to do what it was not designed to do results in defects, slow cycles, and frustrated operators.
How to avoid this: Match your artificial plant injection molding machine to your product requirements before you buy. If you plan to produce two-color leaves, buy a two-color machine.
Mistake 2 – Underestimating the Importance of Mold Temperature
Mold temperature affects part quality, cycle time, and energy consumption. Many manufacturers set the temperature once and forget it. This works until it doesn’t.
How to avoid this: Monitor mold temperature continuously. Use a mold temperature controller with good accuracy and response time. Record temperature data and watch for trends.
Mistake 3 – Ignoring Material Drying Requirements
Wet material causes bubbles, surface defects, and degraded mechanical properties. Some manufacturers skip drying or use inadequate equipment because they think drying is optional.
How to avoid this: Dry all materials according to manufacturer specifications. Use a dryer with sufficient capacity. Monitor moisture content regularly.
Mistake 4 – Skimping on Automation
Manual part removal works for small volumes. For high-volume production, manual removal is a bottleneck. It limits cycle time, increases damage, and creates inconsistency.
How to avoid this: Invest in automation early. A take-out robot pays for itself through higher output and lower scrap. Start with basic automation and add more as you scale.
Mistake 5 – Poor Layout Planning
Cramming equipment into a small space creates safety hazards and inefficiency. Operators cannot move freely. Maintenance artificial plant injection molding machine is difficult. Material flow is interrupted.
How to avoid this: Plan your layout before you buy equipment. Leave space for maintenance access. Design material flow to move in one direction. Include space for future expansion.
Author: Octaivus Yang, Senior Engineer, Haichen artificial plant injection molding machine