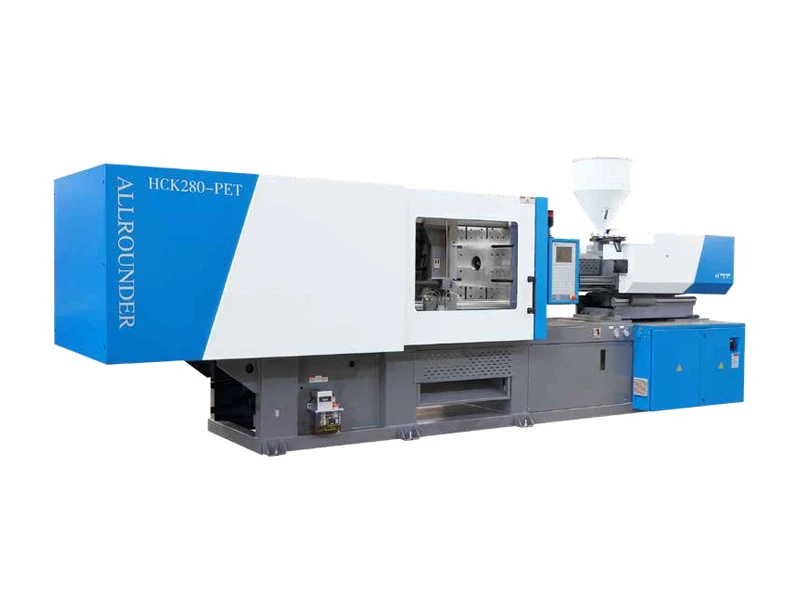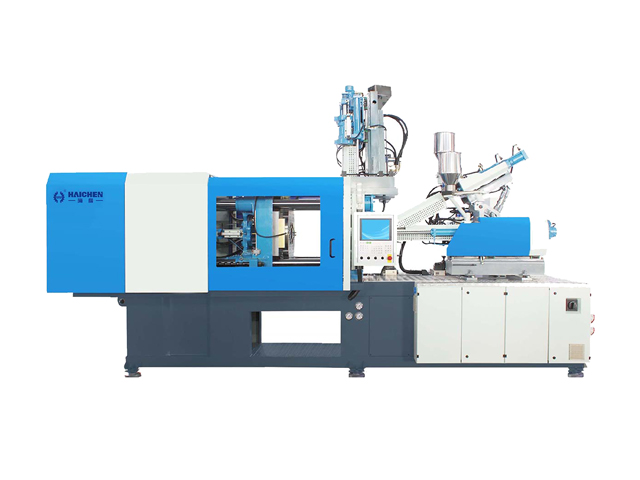
Plastic colander manufacturing turns plastic raw materials into kitchen products that people use to wash vegetables, drain pasta, and rinse fruit. Manufacturers often use injection molding to make these products because the process can create drainage holes, curved walls, handles, and strong rims in a repeatable way.
A plastic colander may look simple, but its production needs careful planning. The plastic must fill the mold, form each drainage hole correctly, and cool without changing shape. In addition, the finished product must feel strong enough for daily use and meet the needs of its target market.
From material selection to final inspection, every step affects product quality. By understanding how manufacturers make plastic colanders, buyers and product designers can better understand the materials, tools, and production methods behind these common kitchen items.
What Is a Plastic Colander?
A plastic colander is a kitchen container with holes that allow water to drain away from food. People use it to wash vegetables, rinse fruit, drain noodles, and prepare other ingredients.
Manufacturers make plastic colanders in many shapes and sizes. Some have a round bowl with a flat base, while others have long handles, feet, or a wide rim. The design depends on how people will use the product and how much food it needs to hold.
Plastic Colander vs. Plastic Strainer
People often use the words “colander” and “strainer” to describe similar products. However, the two terms can refer to different designs.
A colander usually has a bowl-shaped body with several drainage holes. It allows water to flow out while the food stays inside. A strainer may have a finer screen or smaller openings for filtering smaller pieces.
Manufacturers may use injection molding for both types. However, a product with a fine mesh may need a different design or manufacturing method from a rigid plastic colander with molded holes.
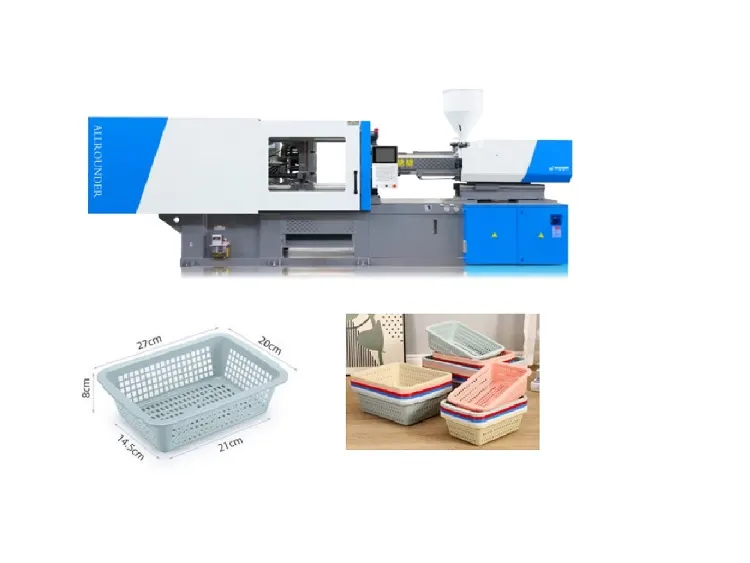
Common Types of Plastic Kitchen Colanders
Plastic colanders come in different designs to meet different kitchen needs.
- Round colanders: These are common for washing vegetables and draining pasta.
- Colanders with handles: The handles make it easier to lift and carry the product.
- Deep draining baskets: These can hold a larger amount of food or water.
- Plastic washing bowls with holes: Some designs combine washing and draining in one product.
- Nested colander sets: These products fit inside one another to save storage space.
- Two-color colanders: Some products use two colors to create a different appearance or combine parts with different functions.
Although the products share a similar purpose, their shapes and features affect the mold design. For example, long handles may make ejection more difficult, while a thick rim may need extra attention during cooling.
What Plastic Are Colanders Made Of?
Material choice affects the weight, strength, flexibility, appearance, and cost of a plastic colander. Therefore, manufacturers should select the material before they finalize the mold and production settings.
PP for Plastic Colander Manufacturing
Polypropylene (PP) is a common material for plastic kitchenware. It has a low density, offers good chemical resistance, and can provide a useful balance of stiffness and flexibility.
Manufacturers often consider PP for colanders because it can form lightweight products for everyday use. It is also available in many grades and colors.
However, not all PP grades perform in the same way. Some grades offer greater stiffness, while others provide more flexibility or different flow properties. For this reason, the manufacturer should check the grade’s properties before starting production.
PP also shrinks as it cools. The mold designer must account for this shrinkage to help the finished colander keep the required shape and dimensions.
Other Plastics Used for Kitchen Strainers
Although PP is a common choice, other plastics may suit certain kitchen products. The final choice depends on the design, working conditions, product cost, and market requirements.
For example, some manufacturers may consider HDPE for products that need a different balance of toughness and flexibility. Other plastic grades may suit specific designs or special product requirements.
The team should compare material strength, flow, shrinkage, surface quality, and processing needs before making a decision. A material that works well for one basket may not be the best choice for another.
How Material Choice Affects Product Quality
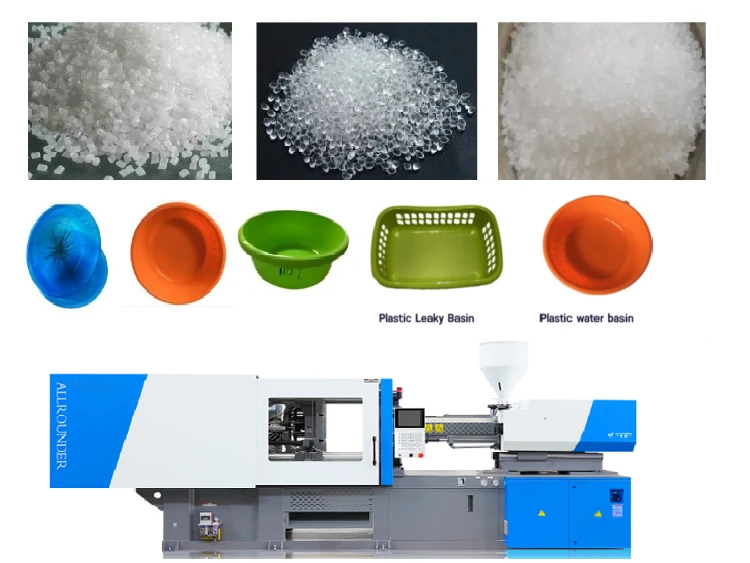
The plastic grade affects more than the final product’s strength. It also changes how the material flows into the mold and how the part behaves during cooling.
Manufacturers should check these points:
- Melt flow: The plastic must flow through the mold and fill the thin areas.
- Shrinkage: The material may change size as it cools.
- Stiffness: The body and rim must hold their shape during normal use.
- Impact strength: The product may need to withstand drops and everyday handling.
- Color and surface finish: The material must meet the intended appearance.
- Food-contact requirements: The material and color additives must meet the rules for the target market when the product touches food.
In addition, the factory should follow the material supplier’s processing instructions. Some grades need drying, while standard PP normally does not require routine pre-drying under normal storage and handling conditions.
Is PP Safe for Kitchen Colanders?
PP can be used in food-contact products when the selected grade and finished product meet the applicable requirements. However, choosing PP alone does not automatically make a colander suitable for every food-contact use.
Manufacturers must check the resin grade, color additives, and any other materials that may contact food. They should also obtain the required documents for the target market.
For example, the requirements may differ between the United States, the European Union, and other regions. Therefore, buyers should confirm the relevant rules before mass production begins.
How Does Plastic Colander Manufacturing Work?
Manufacturers commonly use injection molding to produce rigid plastic colanders in large quantities. The process can form the main body and drainage holes in a mold, which helps create repeatable products.
The exact production plan depends on the colander design. However, many injection-molded products follow the same basic steps.
Step 1: Select the Plastic Material
First, the manufacturer chooses a plastic grade based on the product design and its intended use.
The team checks the required stiffness, flexibility, color, surface finish, and cost. It also considers whether the product needs to meet food-contact requirements.
Once the team confirms the material, it can plan the mold and molding process around the selected grade. This reduces the risk of changing the design after the factory has already started production.
Step 2: Prepare the Plastic Raw Material
Next, the factory prepares the plastic pellets for molding. Workers or automatic material systems feed the pellets into the machine hopper.
The material must stay clean and in a suitable condition. If the grade needs drying, the factory should follow the supplier’s instructions.
For standard PP, routine drying is usually unnecessary under normal conditions. However, poor storage, contamination, or special material grades may require additional checks.
The team should also manage color changes and material handling carefully. This helps reduce contamination and keeps the finished product’s color more consistent.
Step 3: Design and Prepare the Plastic Colander Mold
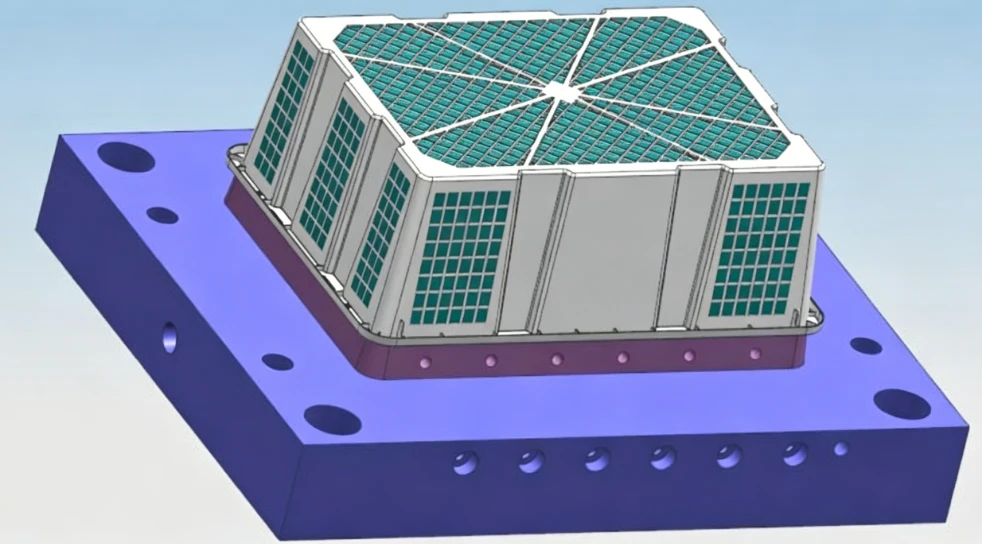
The mold gives the colander its shape. It contains a cavity that forms the outer body, base, rim, handles, and other features.
The mold must also include a way to form the drainage holes. Core pins or other mold features create these openings while the plastic fills the cavity around them.
Before production, the team checks the mold dimensions, gate position, venting, cooling channels, and ejection system. It also confirms that the mold fits the selected injection molding machine.
A good mold design helps the factory make clean holes and maintain the product’s shape. In contrast, poor venting or uneven cooling may lead to defects even when the machine settings appear correct.
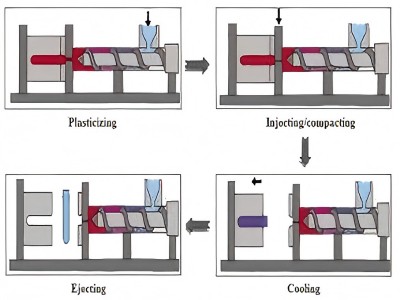
Step 4: Melt the Plastic in the Injection Molding Machine
After material preparation, the machine feeds plastic pellets into a heated barrel. A rotating screw moves the pellets forward while heat and mechanical movement melt and mix the material.
The screw then prepares the required amount of molten plastic for the next cycle.
Temperature control matters because the plastic must flow well without overheating. If the melt temperature falls outside the suitable range, the material may fill the mold poorly or lose some of its intended properties.
Therefore, the operator should follow the material supplier’s processing guide and check the settings during production trials.
Step 5: Inject the Plastic into the Mold
Once the melt is ready, the machine closes the mold and injects the plastic into the cavity.
The molten material passes through the runner and gate before filling the main body of the colander. It also flows around the features that form the drainage holes.
The machine needs enough injection pressure and speed to fill the mold completely. However, the right settings depend on the product’s size, wall thickness, gate location, and material grade.
If the melt cannot reach the end of the cavity, the product may have incomplete edges or other short-shot defects. On the other hand, poor venting or excessive cavity pressure may create burn marks or flash.
Step 6: Apply Holding Pressure
After the plastic fills the cavity, the machine applies holding pressure for a set period. This helps feed more material into the mold as the plastic begins to shrink.
If the holding pressure is too low, the product may show sink marks or changes in size. However, excessive pressure may cause flash or make ejection more difficult.
The operator should check the product’s weight, shape, and surface quality during trials. These checks help the factory find a suitable process window for the selected mold and material.
Step 7: Cool the Plastic Colander
The plastic must cool enough to keep its shape after the mold opens. Cooling channels inside the mold remove heat from the molded part.
Cooling time affects both quality and output. If the product leaves the mold too early, the body or rim may bend. However, an unnecessarily long cooling time can slow production.
For this reason, engineers review the wall thickness, mold temperature, and cooling channel layout when improving the cycle. They should confirm any change through real production checks rather than judge the result by speed alone.
Step 8: Open the Mold and Remove the Product
After cooling, the machine opens the mold and the ejector system releases the colander.
Some production lines use a robot to remove the product and place it on a conveyor or collection area. This can reduce manual handling and help keep the production cycle stable.
However, the product must be firm enough before removal. If the ejector pushes the part in the wrong place or the robot grips it too strongly, the thin walls may bend or show marks.
The factory should test the ejection system and keep the removal path clear before moving to full production.
Step 9: Inspect and Finish the Colander
After removal, workers or automatic systems check the product for visible defects. Depending on the mold design, the factory may also need to trim runner material or remove small unwanted edges.
The team checks whether the drainage holes are open and well formed. It also checks the rim, handles, base, and other important areas.
Some products need extra finishing, while others can move directly to packing. The exact steps depend on the product design and customer requirements.
Step 10: Pack the Finished Products
Once the colanders pass inspection, the factory prepares them for shipment.
The team may stack nested products, place them in bags, or arrange them in cartons. Packaging should protect the products from dirt, scratches, and damage during transport.
For large orders, the factory also needs to plan stacking and packing speed. Otherwise, finished products may build up near the machine and slow down the full production line.
How Are Drainage Holes Made in Plastic Colanders?
Drainage holes are one of the most important features of a plastic colander. They let water pass through while keeping the food inside.
In injection molding, the mold usually forms these holes during the same cycle that creates the body. Core pins or similar mold features take up space where the holes should be, so the plastic forms around them.
Why Drainage Hole Design Matters
The size and layout of the holes affect drainage, cleaning, product strength, and appearance.
If the holes are too small for the intended use, water may drain slowly. If they are too large, small pieces of food may pass through. The hole pattern must also leave enough plastic between openings to keep the product strong.
Therefore, the designer should consider the product’s purpose before choosing hole size and spacing. A colander for draining pasta may need a different hole pattern from a product made for washing small berries.
How Mold Cores Form the Holes
Mold cores create the openings as the plastic fills the cavity. Their position and shape help determine the final hole size.
These cores must be strong enough to withstand repeated production cycles. They also need suitable support inside the mold.
If a core bends or breaks, the product may have a hole with the wrong shape or size. As a result, the factory should inspect the mold and follow a regular maintenance plan.
How to Prevent Blocked or Poorly Formed Holes
Sometimes, plastic does not fill the area around a small mold feature correctly. The finished product may then have blocked holes, uneven edges, or other defects.
The team should check material flow, injection settings, venting, and mold condition. In addition, the factory should inspect the hole pattern during production rather than wait until a large batch has been made.
Good mold design and stable process control help reduce the risk of these defects.
What Affects the Quality of a Plastic Colander?
Several factors affect the quality of a molded colander. The material, mold, machine, and cooling process must work together to create a product that meets the design requirements.
Wall Thickness and Product Strength
Wall thickness affects stiffness, cooling, material use, and product weight. If the walls are too thin, the colander may feel weak or fail to fill completely. If they are too thick, the product may use more material and need a longer cooling time.
The designer should choose a suitable wall thickness for the intended use. At the same time, a more balanced design can help the plastic fill and cool more evenly.
Mold Cooling and Warpage
Warpage occurs when different areas of the product shrink at different rates. The base may bend, or the rim may lose its intended shape.
Uneven cooling, material shrinkage, wall thickness, and holding pressure can all affect the final shape. To reduce warpage, the team can review the cooling channels, gate position, and molding settings.
However, machine adjustments alone may not solve the problem if the mold or product design creates uneven cooling.
Surface Quality and Flash
Flash is a thin layer of plastic that escapes between mold surfaces. It may appear along the rim or parting line.
Possible causes include poor mold fit, worn mold surfaces, excessive cavity pressure, or insufficient clamping force. The team should inspect the mold before making major changes to the machine settings.
The factory should also check for scratches, burn marks, and flow lines. These defects can affect the look and feel of the finished kitchenware.
Dimensional Accuracy
The colander’s diameter, depth, rim shape, and handle position affect how it fits with other products or kitchen items.
If the part shrinks too much or warps during cooling, it may not match the design. Therefore, manufacturers should check key dimensions during production and keep the process stable.
For nested colander sets, the fit between sizes matters as well. The products should stack properly without becoming difficult to separate.
What Injection Molding Machine Is Used for Plastic Colanders?
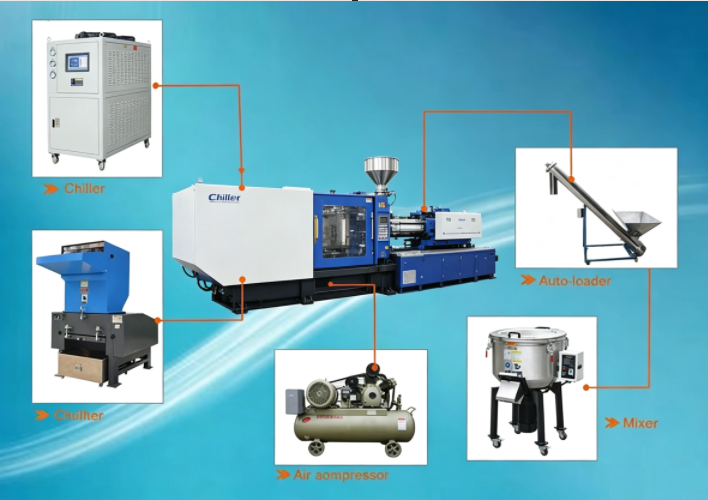
Manufacturers use injection molding machines that match the colander size, material, mold, and planned output. The correct machine depends on the actual design, so one machine specification does not fit every product.
Clamping Force and Mold Size
Clamping force keeps the mold closed during injection. The required force depends on the projected area of the molded parts, cavity count, and expected pressure inside the mold.
A machine must also provide enough platen space, tie-bar spacing, and opening stroke to fit the mold and release the product.
Therefore, buyers should share the product drawing and mold details before selecting a machine. This helps the supplier check machine compatibility.
Shot Weight and Injection Performance
The injection unit must provide enough plastic for the complete shot. The team should consider the finished part weight, number of cavities, runner weight, and material grade.
Injection speed and pressure also matter because the melt must fill the mold before it cools too much.
For this reason, the machine selection should consider both shot size and the filling needs of the mold. The supplier can then recommend a suitable configuration based on the actual project.
Automation for Plastic Kitchenware Production
Some factories use robots to remove molded colanders and transfer them to a conveyor or packing area.
Automation may reduce manual handling and help improve output consistency. However, the robot, molding machine, inspection, and packing steps must work at compatible speeds.
A complete production plan should include these downstream steps rather than focus only on the machine cycle.
For a detailed equipment selection guide, read Plastic Colander Injection Molding Machine: How to Choose the Right Machine. This related article covers clamping force, injection unit selection, mold design, common defects, and production efficiency.
How Can Manufacturers Improve Plastic Colander Production Efficiency?
A good production line needs to control cycle time, material use, and product quality. The fastest machine setting is not always the best choice if it leads to more rejected parts.
Reduce Cycle Time Without Affecting Quality
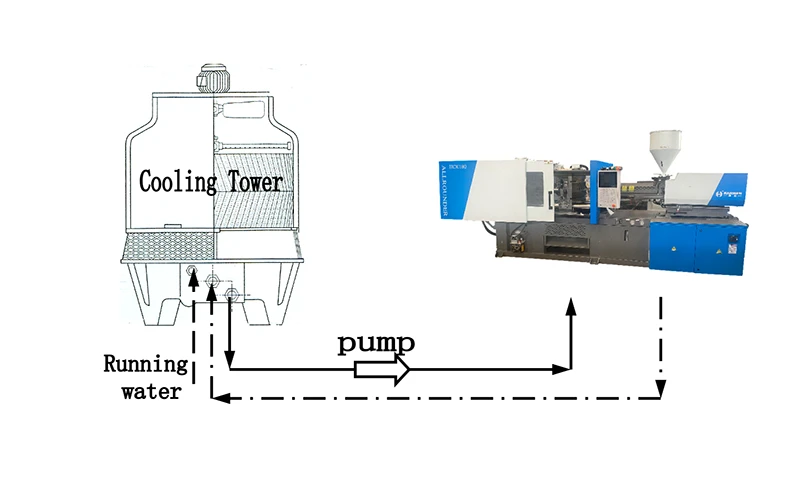
The molding cycle includes filling, holding, cooling, mold opening, and part removal. Cooling often takes a large share of the cycle.
The team can review cooling performance and robot movement to identify delays. However, it should not reduce cooling time until the product can keep its shape after removal.
A useful trial records cycle time, part weight, product dimensions, and defects. This helps the factory compare different settings and select one that supports both output and quality.
Control Material Waste
Material waste can come from rejected parts, flash, incomplete filling, and other defects.
The team should record the main reasons for scrap. For example, repeated short shots may point to a filling issue, while warpage may point to uneven cooling or a design problem.
Once the factory identifies the cause, it can test a focused change. This approach is more useful than changing several machine settings at the same time.
Improve Packing and Handling
The molding machine may produce parts faster than workers can inspect or pack them. If this happens, finished products can build up near the machine and slow down production.
The factory should plan the packing method before mass production begins. For example, nested products may need a set stacking pattern to avoid damage and make counting easier.
If demand is high, a conveyor or automatic stacking system may help. However, the factory should match the equipment to its real production volume and budget.
Can Plastic Colanders Be Recycled?
Some plastic colanders can be recycled, but the options depend on the material, product condition, local collection system, and recycling rules.
How Thermoplastic Materials Are Recycled
Many thermoplastics can soften when heated, which allows suitable waste material to be processed again. However, the factory or recycler must identify and sort the material correctly.
A plastic colander made from a known resin may be easier to sort than a product made from several materials. Color additives, labels, dirt, and mixed plastics may also affect the recycling process.
Why Material Identification Matters
The recycling process depends on what the product contains. Therefore, manufacturers should know which resin they use and keep material information available.
They should not assume that every used colander can return to food-contact use after recycling. Any recycled material used in a new product must meet the requirements for that product and market.
How Product Design Can Support Recycling
Manufacturers can consider material identification, simple product construction, and easy separation of different materials.
However, the product must still meet its strength, appearance, and safety needs. Recycling should be part of product planning, not a reason to ignore the requirements of daily use.
Frequently Asked Questions About Plastic Colander Manufacturing
How are plastic colanders made?
Manufacturers usually select a plastic material, prepare the mold, melt the plastic in an injection molding machine, and inject it into the mold. After holding pressure and cooling, the machine removes the product. The factory then checks the drainage holes, shape, and surface before packing.
What plastic is commonly used for colanders?
PP is a common choice for plastic kitchenware because it is lightweight and can provide a useful balance of stiffness and flexibility. However, the exact material grade should match the product design, processing needs, and food-contact requirements.
Are plastic colanders injection molded?
Many rigid plastic colanders are made through injection molding. This process can form the body, rim, handles, and drainage holes in a repeatable way. The exact method depends on the product design and production needs.
How are drainage holes made in plastic colanders?
The mold uses core pins or similar features to form the holes during injection molding. The design must provide the right hole size and spacing while keeping enough plastic around each opening.
Why do plastic colanders warp after molding?
Warpage may result from uneven cooling, material shrinkage, wall thickness, gate position, or holding pressure. The team should check both mold design and process settings to find the cause.
What machine is used to make plastic colanders?
Manufacturers use an injection molding machine with suitable clamping force, injection capacity, mold space, and process control. The required specification depends on the product size, material, cavity count, and target output.
Are plastic colanders safe for food?
A colander is suitable for food contact only when its materials and finished product meet the applicable requirements for the target market. Buyers should ask the supplier for the relevant material and compliance information.
Discuss Plastic Kitchenware Manufacturing with Haichen
Plastic colander manufacturing depends on a suitable material, a well-designed mold, and stable injection molding conditions. Each project has different requirements, so manufacturers should review the product dimensions, weight, mold design, and target output before choosing equipment.
Haichen provides injection molding machine solutions for different plastic product applications. If you plan to produce plastic colanders, kitchen strainers, or vegetable draining baskets, share your product drawing, material, estimated part weight, and production target.
Contact Haichen to discuss an injection molding machine for your plastic kitchenware production line.
Author: Yang, Senior Engineer, Haichen Machinery